Sunday, July 31, 2011

Snow camping at Mt St Gwinear, Vic, Australia

I have been acquiring various bits and pieces for winter hiking and as part of the grand plan to do a major trip to Mt Bogong this winter I needed to test out the gear somewhere a bit more local.   Brett, a mate of mine, had just spent a weekend snow-showing at Mt St Gwinear and reckoned it was stunning up there. (Mt St Gwinear is best know as a popular location for cross-country skiing. It is also near Mt Baw Baw, one of Victoria's major ski resorts.)   Not needing much encouragement, I decided to drive up there the following weekend, for a solo walk and a night in the snow.

I left Melbourne after lunch on the Saturday. I would have gone earlier, but got caught up in some last-minute gear activity, including making a pot cosy and making some adjustments to my tyvek bivy.


I got to the Mt St Gwinear carpark around 3.30pm.  A friendly Parks guy directed me to a spot to park.  I quickly changed and headed off up the mountain. 


There wasn't a lot of snow in the carpark or the neighbouring toboggan runs or in fact at the start of the trail.  I was just a little concerned..


..but happily, the snow got deep after about 500 metres and I got the chance to try out the Yowies for the first time.

They were easy to fit and within minutes I was stomping up the trail in them.  Walking in snow shoes was actually quite natural, although I did find I had to take a slightly circular motion when bringing the rear foot forward, to stop the wide-rimmed Yowies from banging into each other.


I was also surprised to find that the Yowies didn't stop me from sinking into the softer snow.  I found I had to stay alert to the firmness of the snow and take smaller steps when necessary.

Mostly, it was a fantastic activity as I was able to walk fairly easily into remote, snow-covered areas. 


It was getting late when I reached the cairn at the summit of Mt St Gwinear.


 Looking northward I saw an interesting-looking valley and decided to find a campside up there for the night.


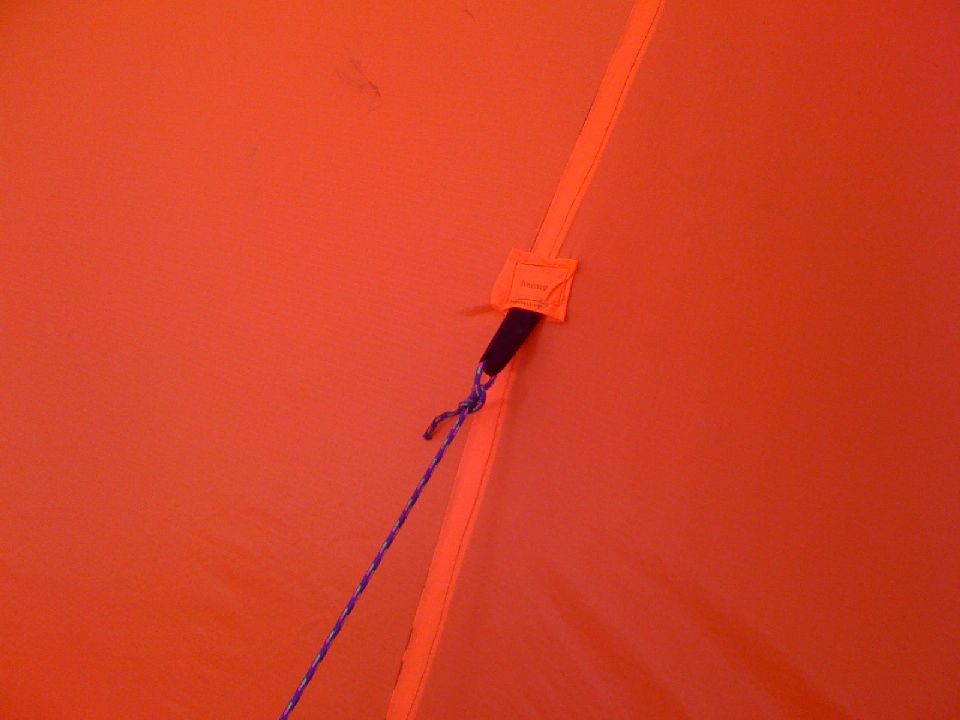
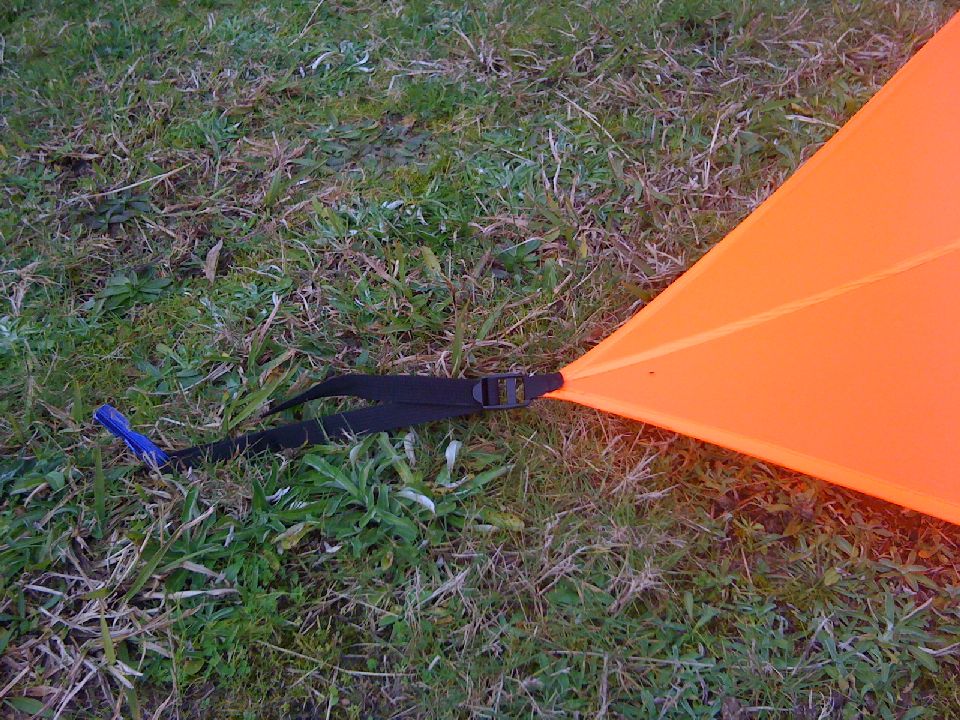
As usual I dithered around a bit locating the 'ideal' spot, then, decision made, I pitched the new MYOG pyramid tent for its maiden voyage.   I used my Snowclaw shovel as the base for the pole.


It was still early - around 6pm, so I mucked around outside for a while.  It was a clear, still night and it provided a great opportunity for some stargazing.  I used a cool iPhone app called 'pUniverse' to help me ID various heavenly bodies.  

Eventually went inside and cooked my dehydrated dinner. It was nice enough - I would mention what it was but they all tend to taste the same to me. :)

The main bit of interest with the meal was that I could give me new pot cosy a run. I had made it from a car's sunshade in the morning and the idea was to use it to keep the food warm when it is cooking. Verdict: it did a great job - the food was still hot when I ate it, despite sitting for 10 minutes in the freezing point temperature.


Had a fairly ordinary night.  I was warm enough -  wearing base layer thermals, fleece top, puffy vest, socks, gloves and fleece beanie, while laying on a Thermarest 3/4 pad and a full length CCF mat, all inside my synthetic sleeping bag (worn quilt-style) and Tyvek bivy- but I had a bit of soreness in a (dodgy) hip.  Standard Votaren tablets weren't sufficient - will try the gel next time.

All was forgotten and forgiven when dawn rolled in and I wolfed down a hot breakfast while enjoying a  morning vista to die for.


Snow started falling early and was to continue for most of the day.


The PVC snow pegs I'd made a couple of weeks earlier did the job well and all bar one were easily removed went it was time to leave.

The Snowclaw shovel didn't get much of a workout - maybe next time.


I headed off on a circuitous route that arced to the north west, then around to south west.


The Buff got some use. It provided some nice protection to the neck and lower face; however, when I was pumping it up hills and breathing hard, it came off.


The place was, in a word, magic.  The sights were beautiful, as from a postcard, and all was silent, bar the crunching of the snow under the snowshoes.


This stunning scene was like something out of "The Lion, the Witch and the Wardrobe."


 I eventually looped back to the way I came up and then back down to the carpark, passing a few cross-country skiiers on the way and finishing around 2pm.  I covered around 5 km on day one (3.30-5.50pm) and around 10km on day two (9am-2pm).  A key take-away is that snow-shoeing is quite a bit slower than regular walking and I will need to make allowances when planning track times.


It was terrific fun walking around Mt St Gwinear and a real opportunity to 'chill-out'.   As a chance to test out some new gear, the walk was a big success.  Other that what I've already mentioned above, the following are worth a mention:

 - the new tent generally performed well, but it struggled with handling a load of snow, with the pole bending badly.  The pole I'd used was a bit under-specced for snow use.  After doing a bit of digging around and getting some suggestions from other hikers, I have created a strap mechanism to connect and bind my ski poles, which then be used as a very strong pole.  I also want to try out a taller pitch, with steeper sides, allowing the snow to slide off more easily.

 - In an effort to combat condensation issues, I had modified my Tyvek bivy to combine Tyvek Homewrap on the lower half and the softer, more breathable 1443R Tyvek on the top half.  I can report that I had no condensation inside the bivy, despite a night where the temperatures dropped to around -2C.

 - The new down puffy vest from North Face was super toasty.I used it both outside and in the tent during the evening and I wore it, along with other clothes, to bed.  I didn't wear it at all on the second day as I was wearing my outer shell jacket in the snow flurries and I was plenty warm enough moving around in temperatures hovering around 0C.

 - I wore my polyprop gloves on day one and my overmitts on day two.  I was a bit concerned that the overmitts got a bit wet, but I suspect that was mostly due to my removing my hands to use my iPhone.  I think I will have to learn how to use my chin to check my bearings! (I cut the end out of the thumb of one of the polyprop gloves to achieve the same end.)

 - I added a CCF pad to my Thermorest 3/4 and between them I was warm enough.  I wouldn't mind a little more padding though.


A downer was the discovery that I'd lost my altimeter somewhere on the trail.    However, I contacted the Parks guys the next day and was delighted to discover that someone had found and handed in the altimeter!  Ah, humanity - just when I was getting cynical!

My base weight for the trip was 10.3kg (23lbs), pack weight was 14.7kg (32lbs) and skin-out weight was
21.2kg (47lbs).  Still too heavy for the lightweight world.  That will be helped a lot when I replace my 2.2kg sleeping bag with a new quilt in the next month or so.

MYOG Pyramid tent

While my first MYOG project, a vinyl tarptent, was great for fulfilling the basic requirements of shelter in the wilderness ie. protection from the elements, it lacked a certain something...namely, space!  I got a bit sick of having to either lie in it or else hunch near the entrance. I also needed a tent that I could share with my wife and daughter.  Finally, I needed a tent that could be used for snow camping.  So when I found the pyramid tent by Jerry Adams on BPL I knew I had found my next project.

[Update Jan 2015: 

After three years of using this tent in the field, I can make the following comments:


  • I recommend that your zipper has two sliders, allowing it to be opened at both ends.  That way you can open the top of the zip for ventilation.  I would also add a little weather hood over the top end of the zipper - use the cord from a weed trimmer to provide stiffness.
  • I have since sewn on a noseeum skirt around the bottom of the tent.   It doesn’t stop all of the bugs, but it helps!  I also use it as a snow flap in Winter.
  • I found the .433” poles originally used would bow badly in strong winds.  I have replaced these with .625” poles or else use ski poles bound together.]


The materials, including 10 yards of silnylon seconds, polyester thread, grosgrain ribbon, webbing, ladderlocs and .433" (11mm) poles, I bought from US-based Quest Outfitters for $133. They were easy to deal with and shipped my order within a day.

[Update: Aussies can also get their materials locally from Simon at www.tiergear.com.au]

The package arrived 8 days later. I was very excited.  Unfortunately we were moving house at this time and it ended up being another 3 weeks before I actually made a start on the project.

I followed Jerry's design and instructions fairly closely.  I also referenced the BPL posts and blog of Chris Roane, who had made an excellent 'mid also using Jerry's design.

My first step was to use a warm iron to remove the worst of the creases that had formed in the silnylon during transit.  This probably was not a absolutely necessary action, but it didn't take long.

I laid out the material and started marking out the pattern using a Sharpie.  I was little nervous using a permanent marker; however I managed to do the mark-up with only one significant stuff-up. (Apparently the marker lines will fade over time :) )  [Edit: They don't!]


For the catenary curve I constructed a platen using a length of timber and two sheets of cardboard placed end to end, then stapled to the board. 

The calculations for the catenary curve were done using a spreadsheet produced by Roger Caffin and modified by Jerry, a copy of which you can find here. I used a 6cm deflection.

[Update - Jan 2015: After much field use I have concluded that a 6cm deflection was too much, as
 - it reduces the interior space
 - for Winter use, the angle of bottom section is quite low, causing snow to collect.  The tent can end up very small!
I therefore recommend a 4-5 cm deflection for this tent design, which will still provide good tension. ]


I then finished the mark-up and cut out the 8 triangular shapes that form the tent.  I had bought a pair of decent (but cheap) sewing scissors from Spotlight and these made the cutting much easier.)

The sewing stage then began in earnest.  I used my wife's Mezzo home sewing machine.  She showed me how to wind a bobbin and thread the needles.  After that I was into it!  (Although I found I had to spend a bit of time reading the manual.)

Getting the tension correct was the biggest challenge and I had many frustrations either unpicking and redoing sections where the thread had bunched up, or else rethreading the machine when the thread had snapped.   I eventually got the hang of it and even started to get a bit of speed into my sewing - quite useful as a tent that's 5 foot high with 9 foot sides needs a lot of sewing.

I learned the joy of a flat felled seam.  I found I needed to do a bit of Googling to get the hang of it.  This video tutorial was helpful. Very satisfying when I did my first one!

I hit a major hurdle half way through sewing when I ran out of orange thread and had to order some more.  For the record, I ended up using about 170 meters.  Adding to the pain was the fact I could not find a supplier in Melbourne for the orange polyester thread (Spotlight have black thread only) so had to wait another week or so for supply from Quest.

Another sewing lesson was that it is important to have a sharp needle.  I broke a needle at one point and on replacing it found the sewing much easier.


After the sewing basics the next major challenge was putting in the zip.  I used the technique that Jerry recommended - sewing the zip face down from the inside, then ripping the lightly-sewn edges on the front to reveal the zip, after which I flat-felled the edges.


To finish off I added top stops to the zipper ends.


Sewing on the reinforcement patch at the apex of the tent was very tricky.  I wasn't that happy with the final result - a  bit fugly - but it seemed strong enough anyway.


I then sewed in the tie-outs to the corners and to the middle of each side edge.  To make the tent more spacious and a bit more wind-proof, I added tie-outs about a third of the way up each side.

I then used a hacksaw to cut up the 11mm Easton poles into 21" lengths and fitted the end caps.

Lastly I made a bag to carry the tent.

I then headed up to a local park to test out my new mid.   To be honest, I was quite pleased with the result.


I love the orange colour - nice and bright.   However, I guess I can forget about using this tent for stealth camping!


The final product has dimensions the same as Jerry's and weighs just 655 gms (23 oz), including bag, tie outs and guy lines.  The pole adds 135 gms (4.8 oz), though I may forego this in the winter for a system using my ski poles connected together.  A set of standard pegs add 180 gms (6.3 oz).   For winter use some snow pegs I made add 575 gms (20 oz).

Monday, July 25, 2011

MYOG Snowpegs (and other winter gear)

With the arrival of winter in Australia my thoughts turned to the prospect of getting in some hiking time above the snow line.  There were a number of challenges stemming from this, not least of which was that I was missing quite a few items of gear needed for cold, crappy conditions, including thermal wear, puffy jacket, snow shovel, snow shoes, 4-season tent, etc.  I decided to tackle the shortfall with a combination of shopping and MYOG.  

For base layer thermals I bought polypropylene top, bottom and gloves.  (I had read that thermals made from wool - especially Merino - provide a bit more warmth and are less prone to becoming smelly; however, given I predominantly do my hiking solo, being stinky didn't seem like such an issue, particularly when you consider the steep premium you pay for wool.)

I got a North Face puffy vest and some Manzella overmitts from Paddy Palins and a great fleece top my wife found at a outdoor clothing sale.

For no particularly good reason at all I got a Buff, after noticing some guys raving about them on my fav forum, Bushwalking Australia.  Why not get one? - they're warm, versatile and sort of cool, in a slightly you've-got-tickets-on-yourself-Survivor sort of way.  And I can assure you that online promotions targeting my demographic had nothing to do with my decision.   Really.

For snow shoes I decided to go with the Aussie-made Yowies.  As luck would have it I found a second-hand pair in excellent condition from John at Adventure Rentals in Melbourne.  I found John to be a top bloke who also had plenty of tips for winter hiking.  We had great fun with me trying out the Yowies in a busy inner city Melbourne cafe.

For a snow shovel I went with a snowclaw I picked up ebay.  I liked the fact it's small and light. Should be fine for small digging chores around the camp, or for sitting on when I need a rest on the trail.

The tent I decided to make myself.  I will cover that in another post.

That just left the snow pegs.  I was going to shell out $3-4 a piece at one of the Melbourne adventure stores, until after a little bit of Googling, I came across MYOG instructions for snow pegs from Christian in Germany.(The link is to his blog, which is in German.  Follow the link at the start of his post to get an English translation or else try Babel Fish.).   I figured it would  be a fun, quick project and would probably save a few dollars in the process.

I bought a 1 metre length of 50mm PVC pipe and a can of spray paint for a total of $12 from Bunnings Hardware.

The procedure was pretty straightforward.

First, I cut the pipe into three 330mm segments.  I then marked out three 53mm divisions around the circumference of the pipes, then cut out the peg shapes using a tenon saw, giving me 9 pieces in total.


Next I sawed out the angles at each end of the pegs - with shallower angles at the top of the pegs.


Next step was to measure out the locations for the tie out grooves (3mm from the top) and for the holes (5mm, 8mm, 12mm, 15mm, 18mm and 21mm from the top). 


I then used a round rasp to make the tie-out grooves and a 10mm drill bit to make the holes.


Finally, I used a file and sandpaper to tidy up the edges, then gave them a couple of coats of spraypaint.

Done!


Total weight for the 9 pegs (& handy hair tie) is 575 gms (20 oz).


I got to use them for the first time last weekend, at Mt St Gwinear, about 2 hours drive from Melbourne.  They worked great.   I am not sure how they will hold up over time - suspect they might become brittle.  Nevertheless, they should do the trick for this winter.


MYOG: My first project - Tarp tent

My very first MYOG project was a tarp tent, made using a design shared by Henry Squires at his Tarptent site.

I had been combing the Net for hiking info and had started to get enthusiastic about the ultralight approach to hiking.  My goal at the time was to create a light-weight shelter to replace the 4kg, 3-man double-walled dome tent I had been using.
.
I used $10 sheets of vinyl and cordage I bought from Anaconda, some plastic grommets I got from Bunnings, and some excellent glue I 'borrowed' from my wife, the potter.

The project spanned a few week nights and a weekend.  I made heaps of mistakes and the end result was kind of fugly - but it was a fun and engaging learning experience and, in the end I made something that I could actually use in the field.

The final product weighs 1kg, including pegs and cord, but excluding staff I use as tent pole, as I carry this anyway.

The tarptent has served its purpose - keeping me dry and bug free in the wilderness, while being quite light weight.